I finished a small platoon called the Airlanding Recce Platoon. In game terms it helps mark targets for other units.. Though this platoon is considered to be too expensive to use in a game I enjoyed painting the vehicles and experimenting on the bases. I also painted the Staff Team for the M1A1 Airlanding Battery and I got a little creative with the basing. On to the pictures!

Painting the crew of a vehicle is just like painting regular figures. Except mounting the crew on cardboard bases does not work so well! Here I use my thriftiness to mount the figures. A few used finishing nails and a leftover piece of insulation foam and VOILA. It is now a cinch to paint the crew.

 I have standardised the colours I use to paint each figure. The light brown basecoat is Vallejo Game Colour "English Uniform". The smock is painted first Citadel Foundation Colour "Tau Sept Ochre" followed by Citadel Paint Color "Scorched Brown" and Citadel Foundation Colour "Orkhide Flesh". Gear and Helmet are also painted "Orkhide Flesh" followed by a drybrush of Citadel Paint Color "Rotting Flesh". The berets are Citadel Paint Color "Red Gore" mixed with just a touch of purple or dark blue (doesn't matter too much) highlighted with Citadel Paint Color "Scab Red".

The dismounted crew of the Recon Patrol is painted and ready for basing. At the same time I finished up the Staff Team for the Airlanding Battery, Royal Artillery unit. I picked the figures for this team with the idea that they would be consulting and staring out into the distance.


I used a few layers of drybrushing to further accent the vehicles. The part that would be metal such as the twin machine gun on the jeep or the shovel on the back of the universal carrier were painted Citadel Paint Color "Chaos Black" and picked out with the metallic Citadel Paint Color "Bolt Gun Metal". The tracks were also painted in "Chaos Black" and a heavy drybrush of the metallic Citadel Paint Color "Tin Bitz" was used I later highlighted the tracks with "Bolt Gun metal". I used the same colour to represent wear on the front mud guards of the universal carrier, as if the carrier had been nosing through some tight spots. The completed crew figures were then broken off the finishing nails and glued into place.

I took a different track in basing these figures. Instead of applying the putty around figures glued to the bases, I applied the putty first and then glued the figures through the wet putty. I don't know how these figures will hold up to use on the table, but I found this method to be less messy. Note the piece of cardboard on the base of the Staff Team, it will be made into a stone wall.
 It is hard to see in the picture below but I have scored the dried drywall compound with blunt knife to create a rough grid pattern. Be careful since the compound may flake. Use a dry brush to gently remove the grit that comes up. Also remember that the rows of consecutive bricks don't line up!

The bases for all of these miniatures was done by drybrushing consecutivly lighter colours. The dirt areas got different shades of brown almost up to a yellow and the stone/rubble started with a very dark grey almost black colour all the way up to white. The progression can be seen in the following pictures. Note that there were more than three layers of drybrushing done.


Here is the completed Airlanding Recon Platoon. The vehicle bases got the same treatment as the other units, I had to be careful not to get paint on the vehicle itself.

Below is the Airlanding Battery, Royal Artillery Staff Team fully painted. I added a little extra detail after the stone wall. I figured they have to be discussing something. The question is: Have they got the maps the right way around?


 The four figures in the foreground are the staff team. The figures in the background are the Recon team along with their vehicles.
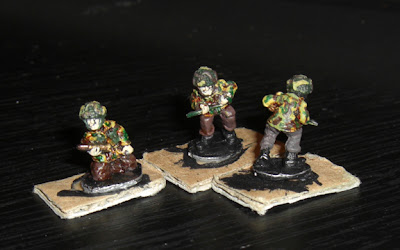
 I tried out the different shades of green and brown that come in the new paint on these figures. I will do a side-by-side picture with some of the other finished miniatures when I am done. In the picture above you can definitely notice the different shade of brown on the pants.
 A little while ago I bought the Vallejo paint "English Uniform". I think the colour works pretty well and I can see a good number of uses for this light brown colour. I cannot say I am thrilled with the paint, it has the same consistency as the Games Workshop paints, or the "dropper" style bottle. I suppose I'll need to work with it a bit more. I still have to base the staff team, so they are not quite done yet.
 Painting a vehicle follows the same process as painting a human figure. At this scale it is fairly easy to paint either. In 25mm miniatures, the flat surfaces tend to show the brushstrokes a bit more. This universal carrier has had a liberal brushing of "Orkhide Green".
 Just like the figures I dry brush a lighter colour over top, in this case its "Rotting Flesh" and use a wash of the ink, "Flesh Wash" to darken the crevices. I still have trouble with the ink, but I got some good tips from one of the Games Workshop staff. In order to avoid the pooling effect simply use another brush to absorb the paint. The other brush should be fairly dry so that the bristles can soak up the paint.
 Next to be done is the flesh. A little care is needed to make sure the detail and shading is not obscured. I used a combination of dry-brushing and wet paint to get the desired effect. Note that you should use only bad brushes for the dry brushing and very fine tipped brushes for painting fingers and faces and so on.


 I thought the ground effects turned out pretty well, though I may add some grass to the gun teams. I am still working out how to apply the grass correctly. When I have that down I'll post how.


 Below is a picture of a pair of gun teams ready for basing. The howitzers are not yet glued on. If I did glue the guns in place the wheels would appear to be below ground (note the extra height provided by the miniatures base). I'll glue the guns on later as the plaster is drying.
 I have used the trio of figures at the furthest guns as experiments for mixing colours and camouflage. They came out a bit bright. Although those figures are far ahead of the others in the painting process I used the same steps I described below.
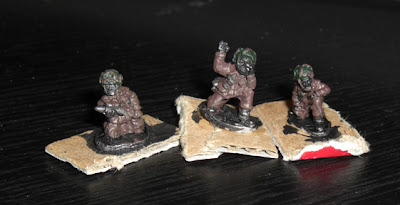 For the Dennison Smocks (basically the jacket) I originlly used Citadel paint's "Bubonic Brown", but that came out too bright. Again mix of "Vomit Brown" and "Dark Angels Green" gave me the colour I wanted. The ration is 4:1 or more. Always remeber to add the darker colour to the lighter (the Green to the Brown in this case) as it takes less of the darker colour to change the lighter than vice versa.