It's been almost three months since I started this challenge. Despite the lack of posting I have not been idle. I've definitely not been on track either.
The Cruel Seas miniatures are nice and easy to paint. I had both the e-boats and torpedoes ready within a week of posting the vospers.
The camouflage pattern is not my favourite, but it helps distinguish the two units when playing a game. I also painted the torpedoes in two different schemes for the same reason.
Below is a shot of my Cruel Seas starter set completely painted.
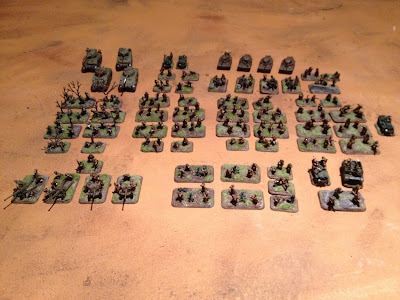
The 15mm half-track and the squad of grenadiers that go with it are on the painting table. However I was not destined to stick to the schedule as I had an opportunity to paint some Warhammer 40k buildings for a local games store.
These things were quite big. Fortunately, the painting challenge counts the size in the calculation of points. I started off with black followed by grey basecoats using rattlecans. The bases are wood covered in sand and wood glue the sand did soak in some of the paint and glue this caused some flakes to come off during the painting process.
The tall building was first to hit the table there were so many skulls to do.
Originally I painted each skull a leather brown, followed by a yellowed bone and then white highlights and a light brown wash. This was quite onerous and I later switched to yellowed bone to start followed by the brown wash and a quick dry brush of bone or pure white.
For the stone I selected a couple of grey paints that formed a gradient and dry brushed over the base. Selective washes were applied to give the effect of burn damage, rust runs, or dirt. Any exposed metal was painted in a bright silverc, which caught the eye even after I washed it in a red brown. Computer and door panel details cannot be seen in these pictures. These were easy enough to paint using GW contrast paints over white or silver.
Dollar store acrylics were used for the base. I was generous with paint since the sand soaked it up.
All in all I thought they turned out ok.
My progress thus far is as follows.
Progress: 110/350
0/1 werewolf 7
25mm
0/4 WWII German grenadiers 20
0/2 Union Generals Mounted 30
0/3 Confederate Generals Mounted 30
0/8 Confederate Cavalry 80
0/1 Union Cannon 4 Crew 10
0/16 Confederate Infantry 80
0/16 Union Infantry 80
15mm
0/1 German half track 8
0/6 German grenadiers 12
Off plan painting
25mm
3/3 Warhammer 40K Buildings 80 (estimate)
10mm
3/3 Vosper MTBs 6
4/4 E-Boats 8
16/16 Torpedoes 8
Clearly I have trouble staying on track with my projects. This trend does continue as the challenge progresses...


 I numbered each figure so that I know what colours I used. Unfortunately I have since lost the page amongst my other gaming supplies. I'll post it once I find it.
 I changed my "order of operations" when painting these teams. I added the drywall compound before finishing the figures. The reason I did this was to make cleaning up errant compound easier and to reduce the "touch up" time.
 In all cases a touch up of the original jacket colour was needed.
  Here are the Tetrarchs, washed with soapy water and assembled in a dry run (no glue).
 I originally was going to paint the tanks using the same method as the jeeps and universal carrier, but I just found that they were painted with a black and green camouflage scheme. Some picture research will be required. I am looking for the book "Airborne Armour" by Keith Flint, who is supposed to be the authority on these tanks.
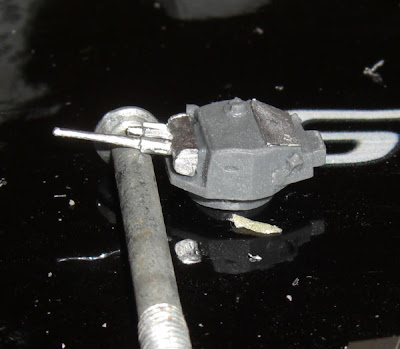
 The commander was also fiddly to put together. He barely fits into the turret (the mini is a bit small) and the hatch needs to be notched at the bottom for it to fit on the turret. In the end I used hatch and the commander to prop eachother up (like two drunks!). A better solution would be to build up the turret opening with a bit of plastic card. I did finally get the tanks assembled and primed using Orkhide Shade.


 The grenadiers had setup evenly across the board and advanced across a broad front in the first turn. Meanwhile the paratroops deployed in a refused flank (east/right side), with the artillery (howitzers and mortars) behind a hill in the south and advanced in to the cover of the wheat fields. Shooting in the first turn was light, resulting in the loss of a single gun from the howitzer platoon.
  On the second turn the heavy machine gun platoon moved to support the grenadiers on the west flank while the second grenadier platoon broke cover and rapidly advanced on the lightly held eastern objective. The paratroops jostled for a better position to assault next turn under cover of a smoke bombardment from the howitzers. The recce and antitank platoons moved to the eastern flank and fired on the advancing grenadiers, destroying the platoon. The airborne mortar platoon was hit by fire from the heavy anti-aircraft gun (one of the dreaded 88s!) on the hill and two German antitank guns firing HE (high explosive).
 The grenadiers and heavy machine guns dug foxholes in the beginning of turn three instead of firing through the smoke bombardment. The German anti-tank guns fired and destroyed the remaining mortars. The British Airborne broke through the cover of the wheat fields, both platoons pouring fire on the grenadiers dug in around the tree line, but failing to cause casualties. Since the howitzer's smoke bombardment was off target this turn Airlanding Platoon 1 carried on their assault on the German anti-tank guns instead of the grenadiers, finishing them off quickly and consolidating on the objective.
 With the British on the objective the Grenadiers had to assault. The heavy machine gun platoon fired on Airlanding platoon 2 pinning them in the wheat field. Fire from the grenadiers and the Flak 36 was shrugged off by the paratroops on the objective, but the assault was very effective. Airlanding platoon 1 was reduced to two fighting teams. These two teams rallied and fought on, throwing back the counter assault and holding the objective at the start of turn 5, winning the game. We called it a draw, however, because the platoon had only two stands and considering how "green" we were it could have gone either way.


 In addition to the compound, the


 The mortar platoon is looking a little bland. I'll try using a brown citadel wash (these paints are the "bees knees" for shading) to darken the face and clothing and give a bit more definition to the figures.
